Ready to learn how to use your Cricut?
This Cricut beginner’s guide will teach you everything you need to know to get started with your new machine.
We’ll cover the basics of how Cricut machines work and what supplies you need to make your first project. After that, we’ll go over some frequently asked questions and terms so that you don’t get frustrated or discouraged!
How to Use a Cricut for Beginners
Just got a brand new Cricut Machine? Congratulations!
Consider this post your ultimate guide to Cricut for beginners. We’ll go over how it works, what you need to use one, and some of my best tips on getting started with your first projects. I hope that after you read it, the Cricut learning curve won’t be quite so steep.
Feel free to use the Table of Contents to jump around and go to the sections you most need to read.
Getting Started with Cricut
Cricut machines are designed to be simple and easy to use. That said, they do take some getting used to – especially if you’re a Cricut beginner.
After you open the box, you’ll likely find yourself wondering:
- Now, what do I do?
- What should I make first?
- How do I get started?
I remember I was so excited to get my first Cricut machine and make all the projects and handmade gifts on my Pinterest board. But, to be totally honest, I was also pretty intimidated by my new machine.
- Will I be able to figure out the design software?
- What materials should I try first?
- What extra supplies and tools do I need?
I get it! I remember what it’s like to be a Cricut newbie.
My first project may not have been Instagram-worthy – but that didn’t matter. I loved the process (and the fast, clean cuts), and I’ve never looked back. Since then, I’ve made so many fun projects, including party and home decor, t-shirts, stickers, and Christmas cards!
Now that I know more, I use my Cricut all the time. I have learned a lot over the years, and I hope this blog post will help Cricut beginners who need a little bit of help getting started.
What is a Cricut?
A Cricut is a cutting machine that can cut a wide variety of different materials, such as paper, card stock, adhesive vinyl, and heat transfer vinyl.
You can use a Cricut to cut just about anything you would typically cut with scissors or a craft knife – but with a lot more speed and precision than you could ever do by hand!
For more information about what a Cricut can do, check out this post: What is a Cricut Machine, and What Can it Do?
How does a Cricut work?
You can think of a Cricut machine like a printer – but instead of printing an image onto a piece of paper, it cuts a shape out of a sheet of paper or vinyl.
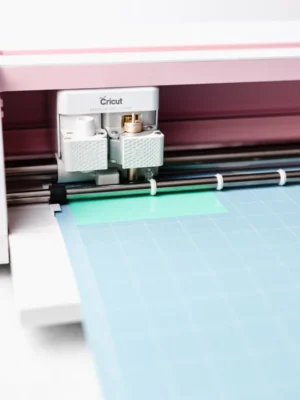
When you open up a Cricut machine, you’ll see a small blade that moves around on a carriage to cut the design you’ve chosen. The fine-point blade is like a miniature X-acto knife that can cut even the most delicate and intricate shapes.
Which Cricut machine should you get?
There are currently three types of Cricut machines on the market: The Cricut Explore 3, the Cricut Maker 3, and the Cricut Joy.
- The Cricut Explore 3 is the mid-level option and the best-selling machine. It can cut various materials and make lots of different types of projects. (This model replaces the previous Cricut Explore Air 2 model.)
- The Cricut Maker 3 is a more powerful model that can cut a wider variety of materials, including thicker materials like balsa wood. The Maker 3 is also compatible with more types of tools, like the scoring wheels, rotary blade, engraving tip, and knife blade.
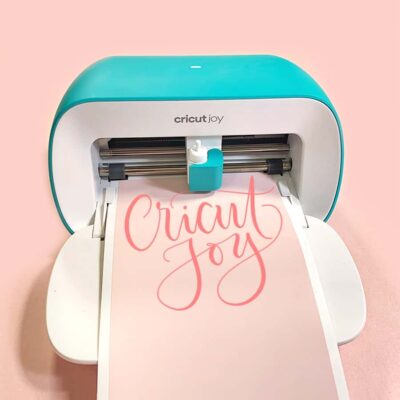
- The Cricut Joy is a smaller model that’s portable, easy to set up, and simple to use.
What’s the best Cricut machine for you? Read this post for a detailed comparison of all current Cricut models: Cricut Comparison: Which Cricut Machine is the Best for You?
What types of materials can Cricut cut?
Cricut machines can cut such a wide variety of materials, it would be hard to list them all. In fact, since the Cricut community is constantly testing new materials, you can expect this list to grow over time.
Some of the most popular types of cutting materials include:
- aluminum foil
- butcher paper
- cardstock
- chalkboard vinyl
- construction paper
- copy paper
- cardboard
- craft foam
- iron-on vinyl
- faux leather
- felt
- glitter cardstock
- glitter vinyl
- Infusible Ink sheets
- magnetic sheet
- natural wood veneer
- parchment paper
- permanent vinyl
- printable sticker paper
- removable vinyl
- smart materials
- stencil film
- vellum
- washi tape
- wrapping paper
Each of the three current Cricut models can cut a slightly different selection of materials.
- The Cricut Explore 3 can cut more than 100 materials – including cardstock, vinyl, iron-on vinyl, glitter paper & bonded fabric.
- The Cricut Maker 3 cut more than 300 types of materials, including paper, vinyl, fabric, paper, wood, and leather.
- The Cricut Joy cut more than 50 materials, including paper, vinyl, iron-on, and some thin faux leather materials.
Check out this helpful article for more information about materials, cut pressure settings, and blade type.
A note on material brands: You do not need to buy Cricut brand materials to be successful. I’ve used and loved Cricut vinyl, but I’ve also had success with Oracal and Siser brand vinyl.
What other supplies and tools do you need?
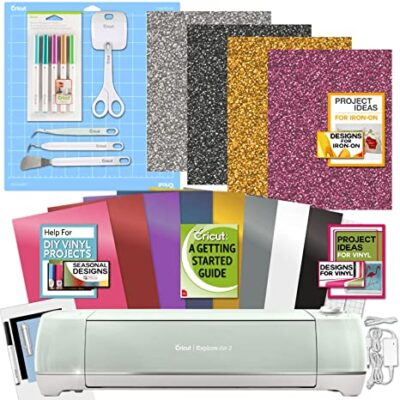
Your new Cricut machine will come with a few supplies and tools that you’ll need to get started. Inside the box, you’ll find a blade, a pen, and material samples for your first project. (Some of the machines come with Cricut cutting mats, some don’t.) You’ll also get a charging cord and USB cable, if compatible.
Materials
After you make that first practice project, you’ll need to buy some more supplies and materials so you can keep creating.
- If you want to make paper projects, shop for scrapbooking paper, cardstock, and vellum.
- If you like to make vinyl projects, you’ll want some adhesive vinyl, iron-on vinyl, and transfer tape.
- If you want to try Cricut Infusible Ink projects, you’ll need the Infusible Ink sheets or markers and a compatible “blank” item.
Mats
If your machine didn’t come with cutting mats, you might want to buy some extra mats. Cricut cutting mats come in 4 different strengths – each for different types of materials. You can buy mats that are 12″ square or 12″ by 24″ for larger projects. Click here for a guide to Cricut cutting mats.
Blades
If you have a Cricut Maker, you can purchase additional Cricut blades and tools that will allow you to make different types of projects. Some of the available tools include the engraving tool, the knife blade, the scoring wheels, and the rotary blade for fabric. Click here for a complete guide to Cricut blades.
Pens
Did you know that you can write with your Cricut? If you insert Cricut pens or markers into the dual tool holder, you can use your Cricut to address cards and envelopes, or draw intricate designs on your paper projects.
Hand Tools
I also recommend buying a few inexpensive hand tools that will make creating with your Cricut even easier. At a minimum, you’ll need a weeding tool and a scraper tool.
Cricut offers a few beginner kits, including a Basic Tool Set and an Essential Tool Set. These kits come with the most essential handheld tools, including tweezers, a weeding tool, scissors, a small spatula, scraper, a scoring stylus, and a paper trimmer.
Heat Press
In order to apply iron-on vinyl to your projects, you’ll need to press it with a heat press, household iron, or Cricut EasyPress. You can use any of these three – but I prefer the EasyPress for most projects because it heats so evenly and consistently.
How to Make your First Cricut Project
The first step is to take your new machine out of the box, plug it in near your computer. Then, sign up for a free Cricut ID account, download the Cricut Design Space app, and install it on your computer.
After that, you’re ready to make your first project. Here are the basic steps to using a Cricut:
- First, choose a design in Cricut Design Space. You can select a pre-made image or design your own.
- Then, select your cutting material and place it on the sticky cutting mat. The mat will hold the material in place while the Cricut cuts the design. Then, press the button to load the mat into the machine.
- Select the correct material settings in Design Space, and send the design to your Cricut cutting machine.
- Press the flashing button on your Cricut machine to start cutting.
- After the machine finishes cutting the design, remove the mat from the machine, and the material from the mat.
Now, you can take your cut paper pieces or vinyl designs, and add them to your projects.

What kinds of Cricut projects can you make?
You can use a Cricut to make a huge variety of different craft projects. Here are a few of the best Cricut projects for beginners:
- iron-on t-shirts and onesies.
- handmade greeting cards
- leather earrings and bracelets
- paper banners and party decorations
- custom stickers
- monograms for a mug, cup, or tumbler
- address envelopes and invitations
- stencils for glass etching
- custom painted wooden sign
- vinyl decals for car windows
- custom pantry labels
- stencils for a painted doormat
- quilt blocks and applique shapes
How to Set Up Your New Cricut
Before you can start crafting, you’ll need to set up your new machine. To set it up, you’ll need a computer or a mobile device and an internet connection.
If you have the choice, I recommend setting up your Cricut with a desktop computer or laptop.
Here are the steps to set up a new Cricut.
- Plug in and turn on your machine.
- Pair the machine to your computer or mobile device with the USB cord or Bluetooth
- Go to Cricut.com/setup to download Design Space.
- Follow the on-screen prompts to complete the setup process.
It seems simple, right? Check out this tutorial, which will walk you through everything in a little more detail: How to Set Up Your New Cricut
How to Download and Install Design Space
As you saw in the section above, the first part of the setup process is downloading and installing the Design Space software.
Cricut Design Space is a design software application that you’ll use to create the images that you’ll cut with your Cricut. You can download it to your desktop, or use the Design Space mobile app on your iPhone, iPad, and Android devices.
Design Space is free to download and comes with many free images and fonts. For an additional fee, you can use images and fonts from the Cricut Access library, which you can find within Design Space.
Here’s how to download and install Design Space on your computer:
- Open up an internet browser window, and go to cricut.com/setup.
- Download and install the Cricut Design Space app for Desktop.
- Follow the on-screen instructions to create and sign in with a Cricut ID.
- On the next screen, select your machine.
- Plug in the machine with the power cord and press the Power button to turn it on.
- Use the included USB cord to connect the machine to your computer, or pair it via Bluetooth. (Joy machines must use Bluetooth.)
- At this point, Design Space may ask you to wait while it updates your machine.
- Then, Design Space will prompt your to register your machine.
Read this Cricut Setup Guide for more even information about downloading Design Space and setting up your new Cricut.
How to Use Design Space for Beginners
Design Space is the design program you’ll use to create and customize designs and send them to your Cricut to cut. Like any software program, it takes a while to learn and fully master. But you can do it!
Let’s start with a brief overview. There are four main screens in Design Space:
- The Home screen. This is where you’ll find your saved images, saved projects, the featured ready-to-make projects, and some Cricut Youtube videos.
- The Canvas screen. This is where you’ll do all your designing and editing. You can upload your own images and SVG files, add text, patterns, and shapes.
- The Prepare Screen. After you click “Make it,” you’ll go to the Prepare Screen, where you’ll see the mat preview. Here you can rearrange objects on the mat, change the number of project copies, or “Mirror” your project.
- The Make Screen. On this screen, you’ll choose your materials settings, double-check that you have the right tools and pens inserted into the dual tool holder, and start the cut.
Design Space is a big topic that really deserves its own series of tutorials. Here are some more Design Space tutorials for beginners:
- How to Slice in Cricut Design Space
- How to Weld Text and Images in Cricut Design Space
- How to Use Attach in Cricut Design Space
- How to Use Flatten in Cricut Design Space
- How to use Contour in Cricut Design Space

How to Upload Your Own Images
Did you know that you can upload your own designs into Cricut Design Space? Cricut Design Space will take your uploaded images and convert them into cuttable shapes.
All it takes is four simple steps (or only three steps if you’re using SVG cut files!)
- Open the Cricut Design Space app and start a new project.
- Click the Upload button, and select the image file you want to upload.
- Select the image type and remove the background with the various eraser tools. (For raster images only – jpg and png images.)
- Name the image, add tags, and click Upload to complete.
You can use these steps when uploading pictures from the Cricut Design Space app on your desktop, laptop, or mobile device (like an iPhone or iPad).
Click to read a tutorial that will walk you through the process in more detail: How to Upload Images to Cricut Design Space
How to Upload Your Own Fonts
Have you ever wanted to use your own fonts to Cricut Design Space? The good news is that uploading fonts to Cricut Design Space is a lot simpler than you may think.
Here are the basic steps to downloading a new font and accessing it within Cricut Design Space.
- Download the font that you want to use.
- Unzip the font file folder. Double click on the individual font file. Follow the prompts on your computer to install the font file.
- Once the font is installed, open Cricut Design Space.
- Create a new project, and add a new text box to your Canvas. Then, click on the font drop-down menu in the top toolbar to change the font.
For a lot more information, including how to install on Windows, Mac, iPhone, iPad, and Android, be sure to read: How to Upload Fonts to Cricut Design Space
How to Cut Paper on a Cricut
Paper cutting is one of the most common types of Cricut projects for beginners. It’s a great way to get familiar with your machine without worrying about messing up expensive materials.
Cutting Paper on a Cricut
- Place the paper or cardstock onto Cricut LightGrip cutting mat.
- Create the design in Design Space, and load the material into the machine.
- Select the appropriate material settings, and load the fine point blade into the machine.
- Press Go to start the cut.
- When the cut is complete, unload the mat.
Here’s an important tip about removing the paper from the mat. Instead of peeling the paper off the mat, flip the mat upside down and peel the mat away from the paper. This may feel awkward until you get the hang of it – but it really is the best way to prevent the paper from curling.
Click here for more information about how to cut paper and cardstock with Cricut.
How to Cut Vinyl
After you’ve made a paper project or two, you’re ready to start cutting vinyl.
In the world of Cricut crafting, there are two main categories of vinyl: adhesive vinyl and heat transfer vinyl. (Cricut calls their line of heat transfer vinyl “Iron-On vinyl” – but it’s the same thing.)
Adhesive vinyl is applied to projects like a sticker. It comes in a variety of types, including removable and permanent adhesive vinyl.
Adhesive vinyl has two layers: the vinyl itself and a paper backing. After the vinyl design is cut, peel off the paper backing and apply it to your projects with a little pressure (not heat).
Here are the simple steps to cut adhesive vinyl with your Cricut:
- Design your project in Cricut Design Space, or load a pre-made design file.
- Place the vinyl on the cutting mat with the paper backing side down. Load the cutting mat into the Cricut machine.
- Back in Design Space, choose the appropriate material settings. Load the correct blade into the machine. Press the Go button to begin cutting.
- When the cut is complete, unload the mat. Weed the excess vinyl from the design with a weeding tool.
For more information, including application tips and troubleshooting mistakes, read this tutorial: How to Cut Vinyl with Cricut

How to Cut Iron-On Vinyl
After you make a couple of projects with adhesive vinyl, try using iron-on (aka heat transfer vinyl).
Iron-on vinyl is a special type of craft vinyl with a heat-activated adhesive. This type of vinyl adheres to fabric or other surfaces when pressed with a heat source like a household iron or an EasyPress.
Iron-on vinyl also has two layers: the vinyl itself and a plastic carrier sheet. If you take a closer look, you’ll notice that iron-on vinyl has a dull side and a shiny side. The shiny side is the side with the plastic liner.
Cutting iron-on vinyl is similar to cutting adhesive vinyl, but with a few important differences.
- Load the vinyl onto the Cricut cutting mat with the “Shiny side down.”
- Make sure to click the “Mirror” toggle button in Design Space to mirror the design before you cut it.
- After weeding the design, use the plastic carrier sheet to transfer the design to your project
One easy Cricut project that’s perfect for beginners is to make an iron-on vinyl t-shirt. Click here to read the full tutorial on how to make Cricut T-shirts.
How to Use Cricut Infusible Ink
Another fun material to cut with Cricut is the new line of Infusible Ink.
Infusible Ink is a new ink transfer product from Cricut. You can use Infusible Ink to create bright, colorful designs with a smooth professional finish on a variety of projects.
Unlike iron-on vinyl, which is applied on top of fabric with heat-activated adhesive, Infusible Ink transfers actually fuse into the fabric material itself. Since Infusible Ink actually becomes one with the material, the design will never flake, peel, wrinkle, or crack.
Using Infusible Ink is as easy as using Iron-On or heat transfer vinyl. The process is actually quite similar.
Here are the basic steps to creating a project with Infusible Ink sheets.
- Select an Infusible Ink sheet and a compatible blank project.
- Create your design in Cricut Design Space. Load the Infusible Ink sheet onto the Cricut cutting mat, and cut out your design with a Cricut machine. Then, weed the excess Infusible Ink from the design.
- Then, place the Infusible Ink design onto your blank project, and apply heat with a Cricut EasyPress or heat press.
Click here more a step-by-step tutorial on how to use Cricut Infusible Ink.
Basic Cricut Terminology
As a Cricut beginner, you’ve likely encountered a long list of Cricut lingo. Here are a few of the most popular terms you need to know:
Vinyl: Usually refers to adhesive vinyl, which is used for decals, stencils, and decoration.
HTV: Heat transfer vinyl, aka iron-on vinyl. A type of vinyl that adheres to your project with heat.
Weeding: The process of removing the excess vinyl from your cut-out design.
Burnish: Use a scraper tool to rub the top of the transfer tape to apply it to the vinyl, or to apply the vinyl to the project.
Cricut Mat: These are the sticking cutting mats that you’ll load with your chosen material, and then load into your Cricut machine. They come in four different colors representing four different strengths: blue, green, purple, and pink.
Test Cut: If you’re using a new material for the first time, it’s a great idea to make a small test cut before you commit to your whole project. That way, you can check that you have the correct materials settings dialed in.
Mirror: Clicking “mirror” flips the design, so it cuts out as a “mirror image.” This is what you do to make sure your iron-on projects come out correctly! (You do not need to mirror for regular adhesive vinyl projects – just iron-on and Infusible Ink.)
Weld: A tool within Design Space that joins overlapping shapes. You can also use weld to join cursive letters.
Attach: A tool within Design Space that keeps objects in the same position relative to each other on the cutting mat as in the Canvas.
Need another term defined? Let me know in the comments.
More Cricut Tutorials
Want even more Cricut information? I’ve got you. Check out these other Cricut tutorials for beginners.
- How to Make Rolled Paper Flowers with Cricut
- How to Make a Stencil with Cricut
- How to Make Shirts with Cricut Iron-On Vinyl
Have questions? Join the Cricut Facebook Group!
I hope this article was useful for you! If you have any additional questions, feel free to join my Facebook Group for Cricut Crafts.
Join the group to share pictures, ask questions, and help each other out.
What’s Next?
Pin this post: Save this tutorial to your Pinterest boards so that you can come back to it later.
Facebook page: https://www.facebook.com/DesignCategory/
>>>Private Group for Verified buyer ONLY: https://www.facebook.com/groups/designcategory247
We’d love to see you there, where you can ask & find any ideal and favorite digital designs including cutting files and sublimation designs.
*FREE Designs are available for you today, please reach our vendors from this table below to get 100% Free digital artwork with many different formats.
| umbrasvg.com |
| designforcricut.com |
| cricutartwork.com |
*Note
Please contact us via these Official social networks below if you have any agent cases. We’ll try to solve your problems as soon as possible.
>>>Paypal Support Department:
*Official Page: https://www.facebook.com/247CustomerSupportDepartment/
*Whatsapp: Please scan QR
>>>Facebook FanPage:
*Section 2: https://www.facebook.com/digitalSupportsection2/
***Passion*Creation*Perfection***
CONTACT FORM
>>>Gmail: paypalservicedepartment.us@gmail.com | website.sangroup@gmail.com
>>>Page: https://www.facebook.com/247CustomerSupportDepartment/
>>>Instagram: https://www.instagram.com/websiteadministrator/